Before adding the bot
Create a Discord Server

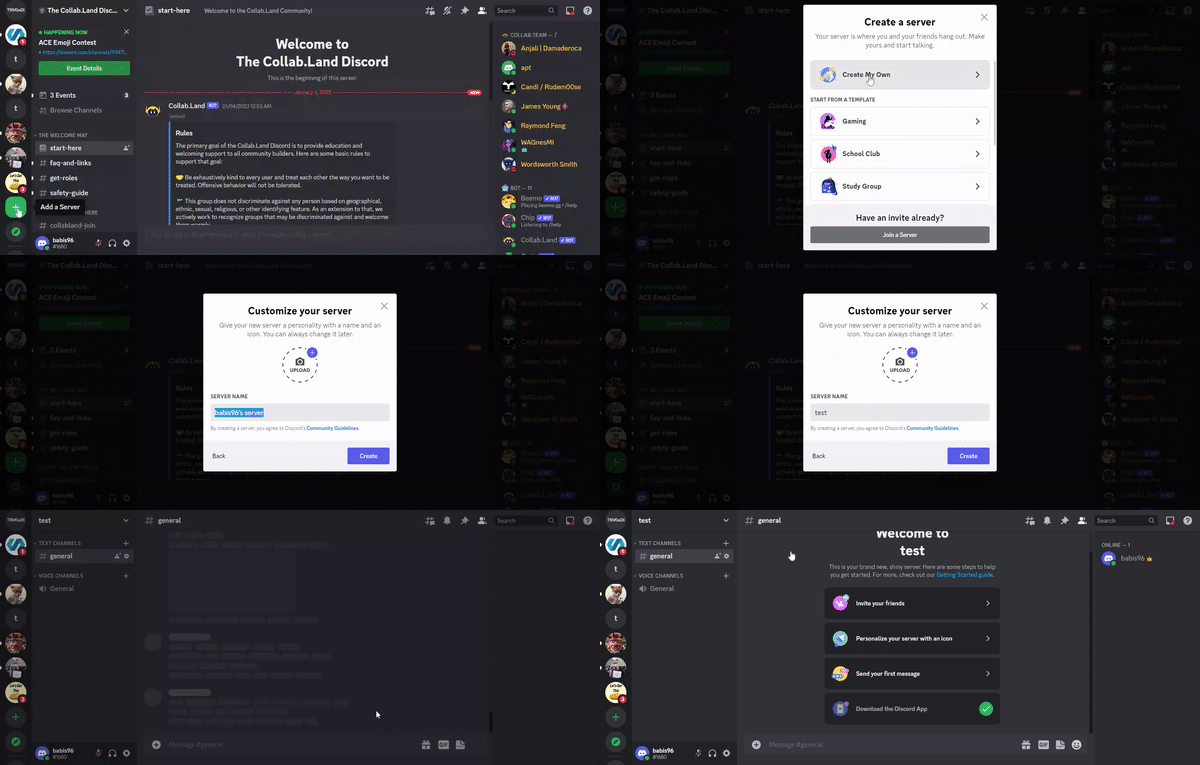
To create your first Discord Server, server follow these steps:
Log in on Discord
Locate the "+" button on the left hand column. If the "+" icon is hidden, scroll down the server column to find it.
When the next window appears, choose the "Create" option.
Enter the desired server name and select a server icon from your files. The minimum size for icons is 128x128 and it's recommended to crop the image in multiples of 128 for best results.
Click "Create" to finalize the process.
Congratulations, you have successfully created your first server!
Create Discord roles

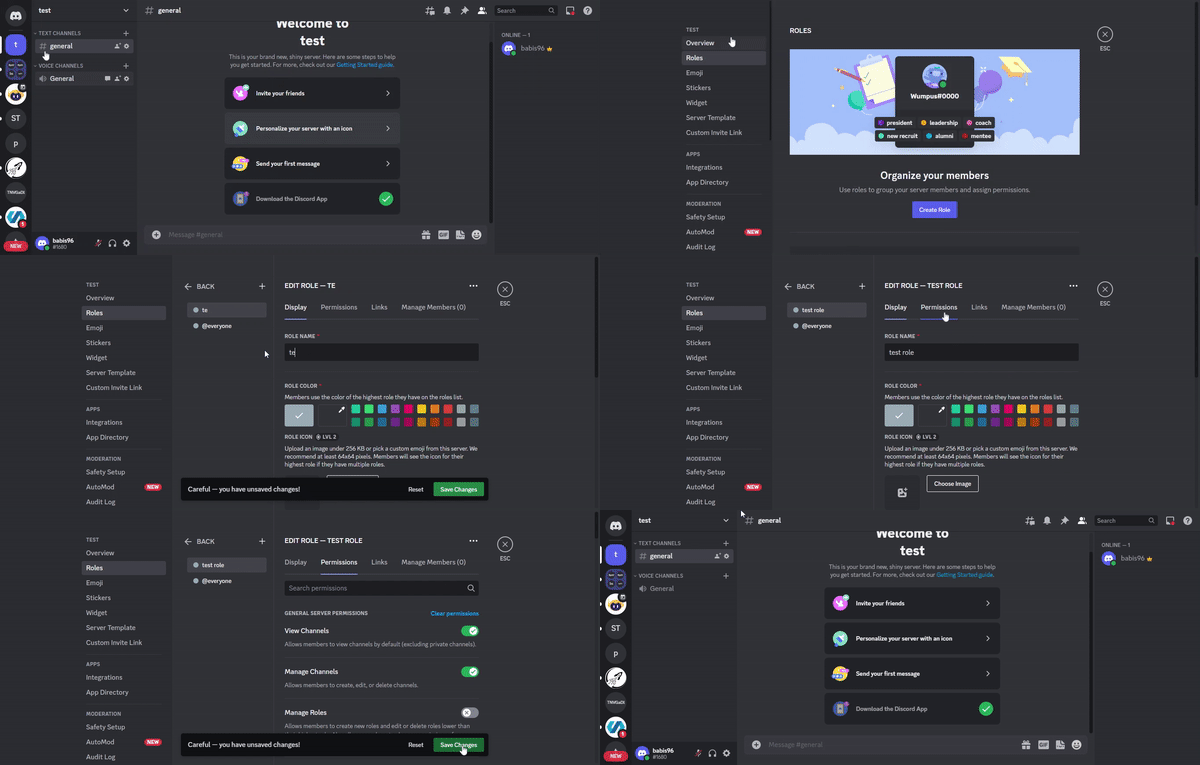
To set up roles in your server, follow these steps:
Right-click the server
Navigate the menu, then choose Server Settings > Roles
Click "Create Role".
Give your new role a name. You can always change this later if needed.
Select the Permissions tab to view the list of server permissions that you can assign to this role.
Assign the desired permissions based on what you want users in this role to be able to do in your server.
Remember to save your changes to the role before exiting.
It's important to note that as the creator of the server, you do not need to assign any roles or permissions to yourself as you will always have access to everything. Also, keep in mind that the pre-made role @everyone defines the permissions that are enabled for everyone on your server, even if they have no other roles assigned to them.